Stucco Removal reveals the inherent beauty of your block walls and offers a fresh canvas for your creative vision. Proper preparation, testing and removal techniques help to minimize damage and achieve your desired aesthetic results.
Stucco remediation is more in-depth than basic stucco removal and repairs the underlying issues that caused moisture penetration and structural damage. It involves removing the water-soaked sheathing or plywood and completing any necessary structural repair.
Taking the time to prepare the work area and gathering the necessary tools will help streamline the stucco removal process. This is an important step that can prevent expensive mistakes and ensure that the project is completed properly. It is also crucial to ensure that proper safety measures are taken during this project.
Begin by covering any surfaces that you do not want to get dust or debris on with tarps or drop cloths. This will protect the surface and furniture from damage during the process. It is also a good idea to cover electrical outlets and switches that are located on the wall you will be working on to avoid any potential hazards.
It is recommended to wear protective clothing, such as gloves, safety goggles, and a dust mask to prevent any potential injury during the removal process. It is also important to make sure that the workspace is adequately ventilated, as the removal of stucco can create a lot of dust and debris.
The next step is to carefully inspect the stucco surface, looking for any cracks or holes that may need to be repaired. It is also a good idea to look at the condition of the underlying structure, as this will affect how well the wash and wash/repair processes will work.
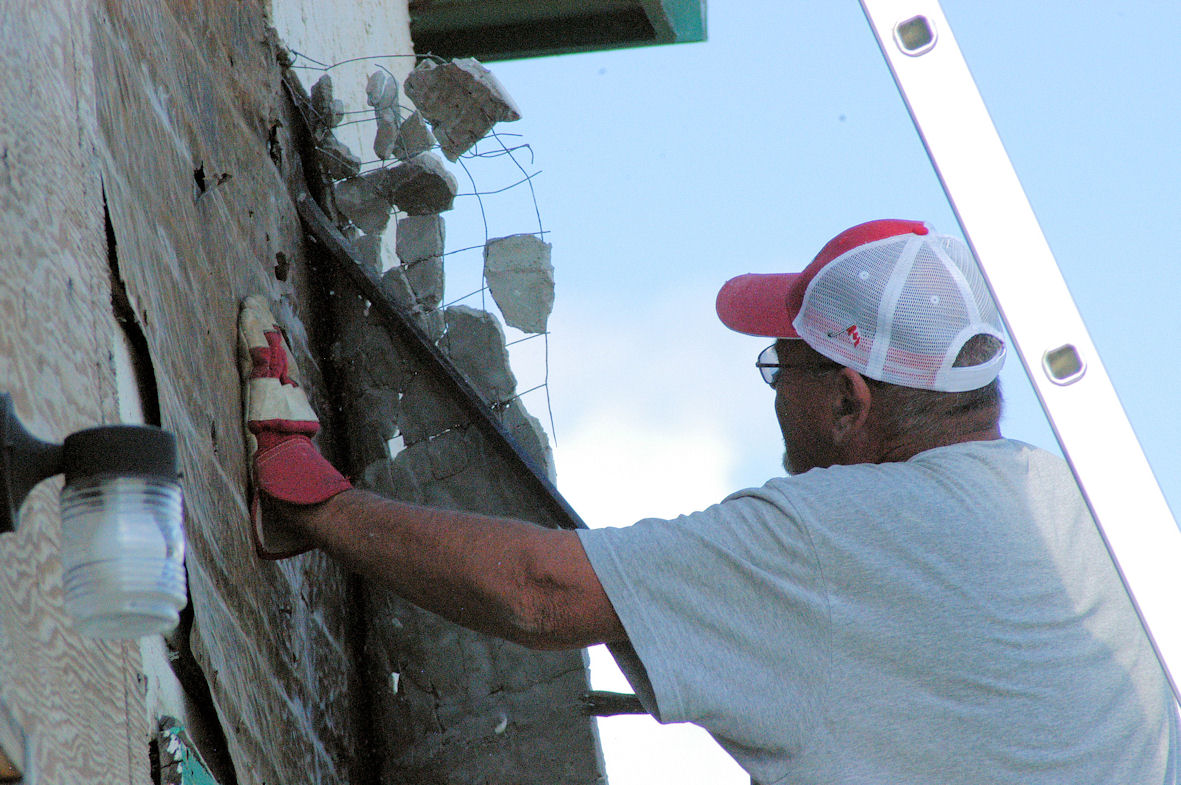
Once the inspection is complete, it is time to start the actual removal process. It is important to choose a small area of the wall to begin with, ideally an inconspicuous location. This will allow you to test your methods and determine the best approach for the rest of the wall. Once you have started, you can use a hammer and chisel to chip away the stucco until it is loose enough to remove with your hands.
After removing the loose sections of the wall, you should carefully clean the remaining stucco with water and a brush or broom. It is important to clean the surface thoroughly, as any dirt left behind can lead to mold and mildew growth in the future. It is also a good idea to dampen the surface before applying a skim coat of plaster in order to improve adhesion and minimize the risk of peeling or blistering.
The right tools can make all the difference when it comes to a successful stucco removal. Having the proper equipment and following the right steps can ensure that you successfully remove stucco and achieve a smooth, clean wall surface, ready for new wall repair and decorations.
Start with protective gear such as safety goggles and work gloves, then choose a spot on the wall to test the stucco for strength and adhesion. A small, inconspicuous area works well; tapping the stucco with a hammer or your knuckles can help you identify areas of weakness and damage. Listen carefully: if the sound doesn’t produce a solid, dense thud, the stucco may not be well-bonded to the lath, and attempting to remove it could result in damage or unnecessary disruption of the surrounding material.
Once you’ve determined that the stucco is firmly affixed to the lath, it’s time to use a stucco saw or angle grinder to score the surface in preparation for its removal. This will help weaken the material and allow for more precise, less damaging detachment. Once the scoring is complete, you can remove larger sections of the stucco with a pry bar. If needed, you can also use a chisel or hammer to break up and chip away any stubborn segments of the stucco.
You’ll also need a wheelbarrow to haul away the large chunks of stucco as you remove them. Depending on the size and number of the chunks, you may need to bring in junk removal services or rent a dumpster to dispose of the debris. A tarp positioned beneath the work site can also be helpful to keep nails and broken pieces of wire mesh from scattering throughout your yard or driveway.
Other important tools include a utility knife, sanding block and putty knife for patching and repairing the walls once you’ve removed the stucco. If you plan to reapply the stucco, you’ll need a power drill with a mixing paddle attachment to mix your chosen stucco mixture. Plastic sheeting can also come in handy to protect surfaces and fixtures near the work site from any accidental splashes or spills during the removal process.
When removing stucco, it’s best to work in small sections. This will help you keep the job on track and avoid damage to the underlying wall or structure. Additionally, it will prevent the buildup of debris or dust that could pose a safety risk.
Establish a 1×1 foot square as the first chunk of stucco you’ll remove. This will give you a feel for the project and ensure you have the physical strength and endurance to continue. If you don’t have the necessary strength or stamina, consider calling in a professional mason to save yourself the time and effort of this labor-intensive home improvement project.
If you’re confident that you can safely tackle the task of stucco removal, use a brush to loosen the surface. Once the stucco is loosened, it’s easy to cut away with a utility knife or scraper. When using a utility knife, be cautious to avoid damaging the underlying structure with improper or excessive force.
Alternatively, you can wet the stucco to soften it before removing it. To do this, mist the stucco with water and allow it to penetrate for a few minutes before using a scraper or putty knife to remove the softened material gently.
If the stucco proves difficult to detach, utilize a pry bar to assist in its removal. Place the pry bar into the scored lines and apply pressure to dislodge or lift off larger segments. Once all of the stucco is removed, inspecting and addressing the underlying substrate is important. This will ensure that the area is free of any damage or debris and ready for any future treatments or finishes.
Finally, clean and store the tools and equipment used in the stucco removal process. This will help prevent unnecessary damage or corrosion and simplify the cleanup process. It’s also a good idea to conduct a thorough safety check before leaving the work area to ensure that it’s safe for future projects or activities.
Stucco removal is a messy job, and it’s important to keep your work area tidy as you go. This is not only a matter of aesthetics; it can also save you time and money during cleanup. As you prepare your workspace, cover surfaces that you don’t want to get dust or debris on with tarps or drop cloths. This will help prevent potential damage to furniture, fixtures, or other materials that could be harmed during the stucco removal process.
Additionally, it’s helpful to take the opportunity to examine the condition of the underlying wall as you remove the stucco. Doing so can reveal issues that need to be addressed, such as severely deteriorated brick that may require a mason’s expertise to restore.
Once you’ve cleaned your working space, you can begin the process of removing your existing stucco texture. To facilitate this task, use chalk to draw guidelines for the first chunk you’ll cut away. It’s best to start small and work your way up to larger sections, as stucco is heavy and you don’t want to strain yourself. It’s also a good idea to check the weather forecast before undertaking this project outdoors. Rain or excessive wind can impede progress and put you at risk for injury.
As you work, be sure to apply consistent pressure while scoring the stucco with a utility knife. This will ensure uniform depth and help you define clean edges that will facilitate controlled removal. Additionally, pay close attention to decorative elements and trim. If necessary, a pry bar can be used to separate the stucco from the lath.
Once you’ve scored the stucco and removed some of it, you can continue to scrape and chisel the remainder until you have a clean surface that can be washed and prepped for new stucco or an alternative wall finish. After the stucco is completely removed, it’s a good idea to wash the walls with a hose sprayer and cleaning solution to remove any residue. This will also allow the underlying wall to dry thoroughly and prevent mold or rot from forming.